<!–
–>

Color correction is nothing new in the makeup industry. With the increasing accessibility of professional makeup products, the idea has finally sunk in with the general public. So how do these differently colored primers and concealers work? Do I need to be a painter to understand the theories behind them? Fret not, I’m here to explain!
The Color Wheel:
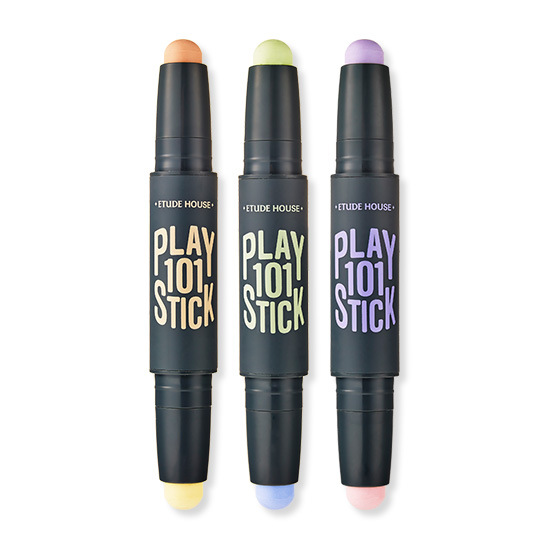
Color correction does have to do with color theory. Remember the color wheel you learned in art class? It sets the premise of color correction. As you probably know, these three color pairings cancel each other out: red and green, yellow and purple, blue and orange. But that’s not enough. You also need to be aware of the brightness of your skin. For instance, pastel colors probably don’t work on ebony skin, while peach and orange may be too dark for fair skin.

Images: MYSA by FOREO (above) / CLIO (below)
What Each Color is For:
Each color has a specific skin imperfection that it is best suited to conceal. In general:
Pink is best for concealing dark circles and dull complexion on fair skin.
Peach is best for concealing dark circles and dull complexion on medium skin.
Orange is best for concealing dark circles and dull complexion on dark skin. It can also be used as a bronzer under the cheeks, at the temples and along the jawline for medium skin.
Mint is best for covering redness such as blemishes and broken capillaries on all skin tones. It can also be used to highlight the T-zone, cheeks and chin for dark skin.
Blue/Lilac is best for highlighting the T-zone, cheeks and chin and cancelling sallowness on all skin tones.
Yellow is best for camouflaging bruises and veins on all skin tones. It can also be used to even the complexion for medium skin.
White is best for highlighting areas of your face, such as on the upper cheekbones, under the brow bones, at the corners of the eyes, down the nose and on your cupid’s bow.

Image: peripera
How to Apply:

Image: CLIO
1. Dab a small amount of pink/peach/orange to under-eye circles.
2. Add green to redness and blemishes.
3. Add purple to dull areas around lips and where highlight is needed.
4. Finish by tapping with a puff for a seamless, natural finish.
You can also use your fingertip to blend the colors with your own skin tone. The warmth from your fingertip helps melt the color corrector for a more natural look.
Color correctors are available in various forms, from primers and sticks to cushion compacts and multi-colored shadow palettes. If you need to cover large areas due to rosacea (mint) or sallowness (lilac), a color-correcting primer may suit you better. But if the areas are small, then it’s better to apply color-correcting concealers on specific spots before your foundation to save product and prevent uneven colors. Find the ones that suit you best, and only apply on areas where they’re needed!
Monochrome Primers:


Monochrome Concealers:


Multi-Colored Concealers:


